The miser's guide to building a display stand
Posted: Sat Jun 04, 2011 6:55 am
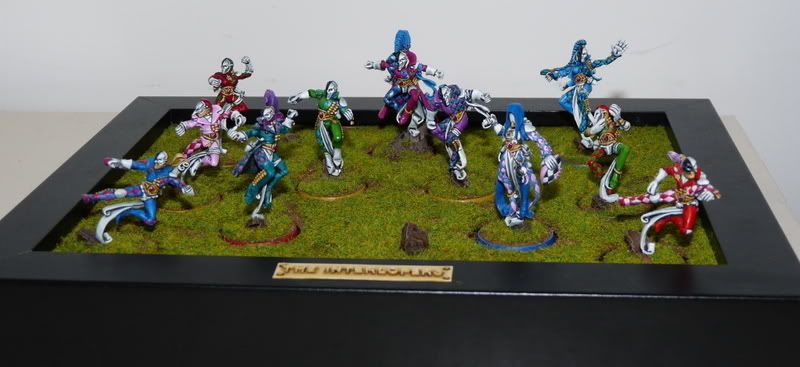
I am by no means an expert, but I thought I would post my (hopefully simple) system, which produced the following:
Stage 1: Gather your materials
You will need some paint, a marker pen, some glue, some flock/static grass/gravel to match your players' bases and a decent craft knife. You will also require some 3mm foamboard or mdf - your choice, but if you lack access to power tools, go for the foamboard. (note: I used foamboard, but I'm confident that mdf would work just as well, if not better)
Finally, get yourself down to Poundland/Hobbycraft/Wilkinsons/any Supermarket. Buy yourself a picture frame. For added miserliness make sure to get one that looks good - you don't want to have to paint it. Also, ensure that your mdf/foamboard section is larger than your picture frame.
Stage 2: Building the base
Take your foamboard/mdf and cut it to the size of your picture frame. If it helps the visualisation process, imagine that the foamboard/mdf as the picture that will sit in the frame. Once it is the correct size, use the marker pen to plan the layout of your display. Use an old base as a marker, and draw lots of little circles.
(if using foamboard, follow option a), as option b) is for mdf)
option a) Using the craft knife, carefully cut out the holes. You want htese to be as smooth as possible, so take your time, and go slow. (nazgob does not accept any liability in the event of injury)
option b) ind a drill. Find a 28mm (or other suitable size) drill bit. Drill out the holes in the mdf.
Once you have made your holes, test them by passing a base through them. If it doesn't fit, you need to make it bigger. Top tip: Make all of the holes a little bigger than they need to be, so that you aren't stuggling to get the minis in and out of their slots.
Stage 3: Painting and Basing
Just as it sounds. Take the foamboard/mdf with holes in and make it match the rest of your team. I went for GW spray black, then brown, then flock/static grass, but I'm sure you can work out what to do.
Top tip: Make sure you paint the edges of the holes a dark colour - you don't them to stand out when they have models in them.
Stage 4: Assembly
Take your picture frame. Remove the glass. Insert the foamboard/mdf as if it were a picture (remember, no glass). Reassemble picture frame.
Finished.
Top Tip: Paint the bottom of your slots black so that they won't show around the edges of the model.